Emerson MPH2 Wartungshandbuch
Stöbern Sie online oder laden Sie Wartungshandbuch nach Stromverteilungseinheiten (PDUs) Emerson MPH2 herunter. Emerson MPH2 Technical Documents Benutzerhandbuch
- Seite / 36
- Inhaltsverzeichnis
- FEHLERBEHEBUNG
- LESEZEICHEN
- Emerson Network Power 1
- Rack PDU 1
- TABLE OF CONTENTS 3
- SAVE THESE INSTRUCTIONS 5
- EUROPEAN UNION 6
- ROHS Compliance 6
- FCC Compliance 6
- SAFETY SYMBOLS 7
- 1.0 INTRODUCTION 8
- 1.1 General Characteristics 9
- 1.2 Model Types 9
- 1.3 Appearance and Components 10
- 1.3.4 Power Components 11
- Branch Overcurrent Protection 12
- 2.0 INSTALLATION 13
- Installation 15
- 11 Emerson 15
- 2.2 Tool-less Mounting 16
- Factory-Supplied 17
- Field-Supplied 17
- 2.4 Connecting Rack Equipment 20
- 2.5 Installing Optional Items 21
- 3.0 OPERATION 23
- 121.1V 359W 24
- Operation 25
- 21 Emerson 25
- IP: 162.1.30.57 27
- MAC ID: 00:00:84:47:31:49 27
- RPC2 FW Ver: 7.0.0.1 27
- 1 2 3 4 5 6 7 8 29
- 3.1.10 View Sensor List 30
- 3.1.13 Silence an Alarm 32
- 4.0 EMERSON 33
- MPH2 RACK PDU SPECIFICATIONS 33
- 5.0 TROUBLESHOOTING 34
- Technical Support / Service 36
- Locations 36
Inhaltsverzeichnis
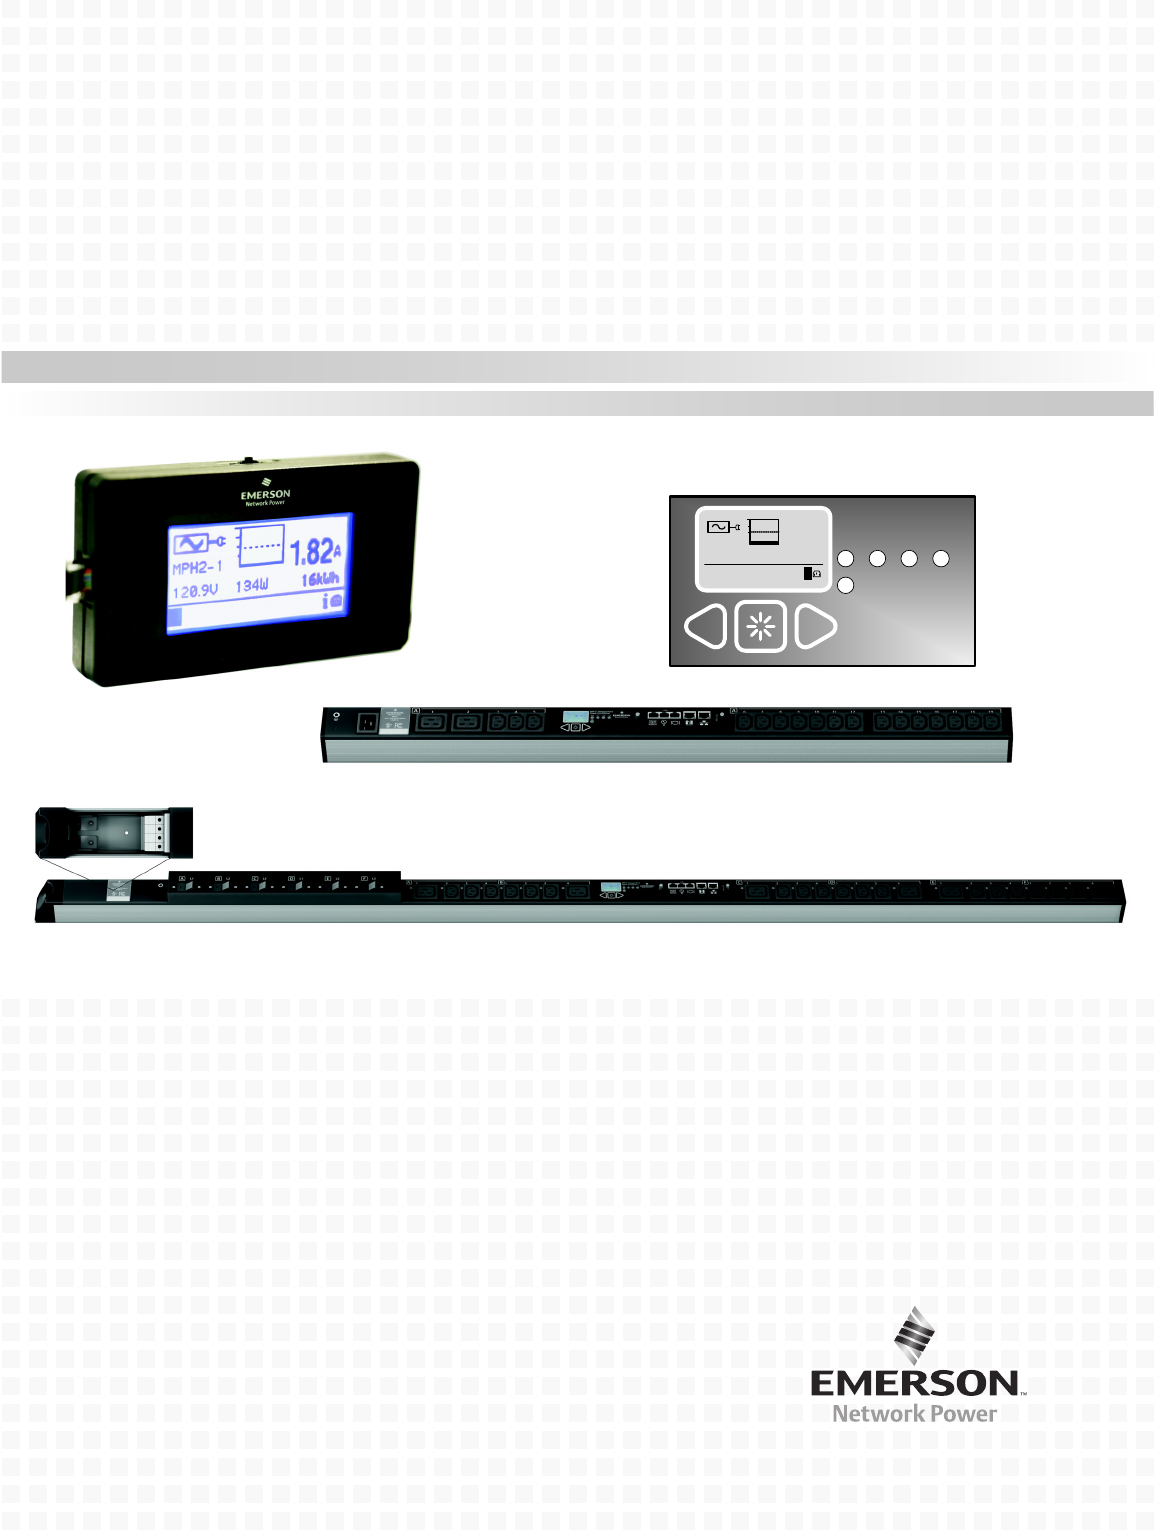
Emerson Network Power® MPH2™ Rack PDUUser ManualMPH2121.1V 359W2.96A2kWhiTXMPH2™Managed RackPower DistributionRXL1 L2L31
IntroductionEmerson® MPH2™61.3 Appearance and Components1.3.1 Controls and Indicators—RPC2™The MPH2 rack PDU is monitored and managed by the factory-i
Introduction7 Emerson® MPH2™Figure 3 MPH2 LCD and LED’s1.3.4 Power ComponentsThe component location and type depend on the model of the MPH2 rack PDU.
IntroductionEmerson® MPH2™8Branch Overcurrent ProtectionModels having more than 16A input current rating are equipped with branch overcurrent protecti
Installation9 Emerson® MPH2™2.0 INSTALLATIONAn MPH2 rack PDU can be installed in an Emerson rack on the frame members using field-supplied hardware. T
InstallationEmerson® MPH2™102.1 Attaching Input Power Cords—Hard-Wired Models OnlyMPH2’s with integral power cords need no assembly before installatio
Installation11 Emerson® MPH2™2.1.2 Attaching Input Power Cords With Conduit1. Remove the end cap. It is held in place with two T10 Torx screws.2. Slid
InstallationEmerson® MPH2™122.2 Tool-less MountingFor tool-less mounting, attach the mounts to the rear of the MPH2 rack PDU, then hang it in the rack
Installation13 Emerson® MPH2™2.3 Installing an MPH2 in an Emerson® Rack2.3.1 Mounting Hardware and Tools RequiredFactory-Supplied•Two brackets• Mounti
InstallationEmerson® MPH2™142.3.2 Safety Earth Ground ConnectionEnsure that the safety earth connection is made before any equipment is connected to E
Installation15 Emerson® MPH2™2.3.3 Recommended Electrical Backup ProtectionA field-provided external circuit breaker must be installed upstream of the
InstallationEmerson® MPH2™162.4 Connecting Rack EquipmentOnce the MPH2 rack PDU has been installed in the rack, the unit is ready for connection of eq
Installation17 Emerson® MPH2™2.5 Installing Optional ItemsThe following items may be added to an MPH2 rack PDU system but are not required.• RPC Basic
InstallationEmerson® MPH2™18To install an RPC BDM in a rack:1. Determine the mounting location.2. Insert a spring nut into a T-slot on the frame membe
Operation19 Emerson® MPH2™3.0 OPERATIONEmerson’s MPH2 rack PDU may be monitored and managed by the factory-installed RPC2 communi-cations module. This
OperationEmerson® MPH2™203.1.1 Getting Information Through the Onboard LCDThe MPH2’s main screen is displayed when the rack PDU is first powered up; s
Operation21 Emerson® MPH2™3.1.2 Adjusting the Onboard LCD’s ContrastThe onboard LCD is factory-set to be easily viewed in lighting conditions found in
OperationEmerson® MPH2™223.1.3 Adjusting the Onboard LCD’s OrientationThe onboard LCD may be flipped for viewing ease. To flip the screen:1. Press any
Operation23 Emerson® MPH2™3.1.5 Determine IP or MAC Address1. Use the Left or Right arrow key to move the cursor to the information icon (the letter i
OperationEmerson® MPH2™243.1.7 View Active Alarms1. Use the Left or Right arrow key to move the cursor to the information icon (the letter i on a blac
Operation25 Emerson® MPH2™3.1.8 View Branch Level Information1. Use the Left or Right arrow key to move the cursor to the information icon (the letter
iTABLE OF CONTENTSIMPORTANT SAFETY INSTRUCTIONS . . . . . . . . . . . . . . . . . . . . . . . . . . . . . . . . . . . . . . . . . . . . . . . .1SAFETY
OperationEmerson® MPH2™263.1.10 View Sensor List1. Use the Left or Right arrow key to move the cursor to the outlet iconin the lower right corner of t
Operation27 Emerson® MPH2™Figure 28 Configuration in progress screen3.1.12 Opening and Closing Circuit BreakersMPH2 rack PDU feature circuit breakers
OperationEmerson® MPH2™283.1.13 Silence an AlarmTo silence an audible alarm, press any of the three navigation keys below the LCD.Figure 30 Silence an
Emerson® MPH2 Rack PDU Specifications29 Emerson® MPH2™4.0 EMERSON® MPH2 RACK PDU SPECIFICATIONSInput Power Configurations; Vary by Model and RegionSin
TroubleshootingEmerson® MPH2™305.0 TROUBLESHOOTINGLED Indication(One or All LED’s)AudibleAlarmCondition Status/Recommended ActionColorState/FlashSpeed
While every precaution has been taken to ensure the accuracyand completeness of this literature, Liebert Corporation assumes noresponsibility and disc
iiFIGURESFigure 1 Vertical MPH2 rack PDU Configuration . . . . . . . . . . . . . . . . . . . . . . . . . . . . . . . . . . . . . . . . . . . . . . 5F
Important Safety Instructions1 Emerson® MPH2™IMPORTANT SAFETY INSTRUCTIONSSAVE THESE INSTRUCTIONSThis safety sheet contains important safety instructi
Important Safety InstructionsEmerson® MPH2™2EUROPEAN UNIONNotice to European Union Customers: Disposal of Old AppliancesThis product uses components t
Safety Symbols3 Emerson® MPH2™SAFETY SYMBOLSThe following symbols may appear within the documentation or on the product.Symbol MeaningHigh Temperature
IntroductionEmerson® MPH2™41.0 INTRODUCTIONThe Emerson Network Power® MPH2™ is the most intelligent, high-availability line of managed rack PDU’s. It
Introduction5 Emerson® MPH2™Figure 1 Vertical MPH2 rack PDU Configuration1.1 General Characteristics• Input ampacities include 16A or 32A for European
Verwandte Produkte und Handbücher für Stromverteilungseinheiten (PDUs) Emerson MPH2
 (8 Seiten)
 (268 Seiten)
© 2020, manymanuals.de. Alle Rechte vorbehalten. | 0.754 s |
 Manymanuals.com
 Manymanuals.de
 Manymanuals.fr
 Manymanuals.it
 Manymanuals.pl
 Manymanuals.cz
 Manymanuals.es
 Manymanuals-pt.com
Kommentare zu diesen Handbüchern